
31st Mar 2026
How to Program Your Baofeng Radio Using CHIRP: A Step-by-Step Guide
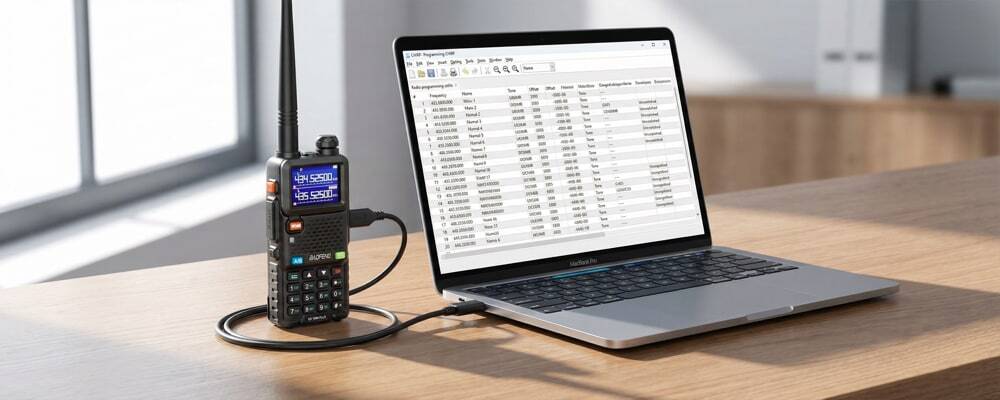
If you want to program your Baofeng with CHIRP, the good news is that the process is usually much easier than entering everything by hand on the radio itself. CHIRP is a free programming tool that works across Windows, macOS and Linux, and it supports many popular radios — including a wide range of Baofeng models.
For many users, CHIRP is the simplest way to save channels, organise memories, back up settings and clone the same setup across multiple radios. The main challenge is usually not the software itself, but getting the right cable, driver and model selection in place. This guide walks through the process in plain English, with practical advice for UK users.
⚡ Key Takeaways: Baofeng CHIRP Programming
- Always Download First: Before making any edits in CHIRP, always use "Download from Radio" to create a safe backup of your factory settings.
- The Cable is Crucial: 90% of CHIRP errors are caused by a loose 2-pin connection or missing CH340 USB drivers on Windows or Mac.
- Check Model Support: Not every Baofeng variant is supported by CHIRP. Verify your model on the CHIRP wiki before starting.
- UK Compliance: Programming a frequency into your Baofeng does not make it legal to transmit on. Ensure you hold the correct Ofcom licence for the frequencies you use.
📋 Table of Contents
What is CHIRP and Why Do People Use It?
CHIRP is a free, cross-platform radio programming tool that supports radios from many manufacturers. The CHIRP project says it works on Windows, macOS and Linux, and recommends using the latest dated build rather than looking for a separate "stable" release.
People use CHIRP with Baofeng radios because it can help with:
- Adding and editing memory channels more quickly than using the keypad
- Naming channels clearly with alphanumeric labels
- Copying settings from one radio to another (cloning)
- Backing up a working configuration before making any changes
- Adjusting common menu settings on supported models
For beginners, programming a Baofeng radio using software is often far easier and less error-prone than trying to do all of this through the keypad menu system.
Before You Start: Preparation Checklist
1. Check That Your Baofeng Model Is Supported
Before installing anything, make sure your radio is one of the models supported by CHIRP. CHIRP's FAQ states that if a radio is listed on the front page, it is supported — if it is not listed, it is not. The CHIRP wiki also has model-specific guidance for the Baofeng UV-5R Series, UV-82 and related variants.
This matters because some Baofeng-branded models and variants do not behave identically, even when they look visually similar on the outside.
2. Download the Latest CHIRP Build
CHIRP is distributed as automatically generated dated builds, and the project recommends using the latest build available. That means you should:
- Download CHIRP only from the official CHIRP website
- Avoid random third-party download pages that may host outdated or modified versions
- Keep your version reasonably current if you are using a newer Baofeng variant
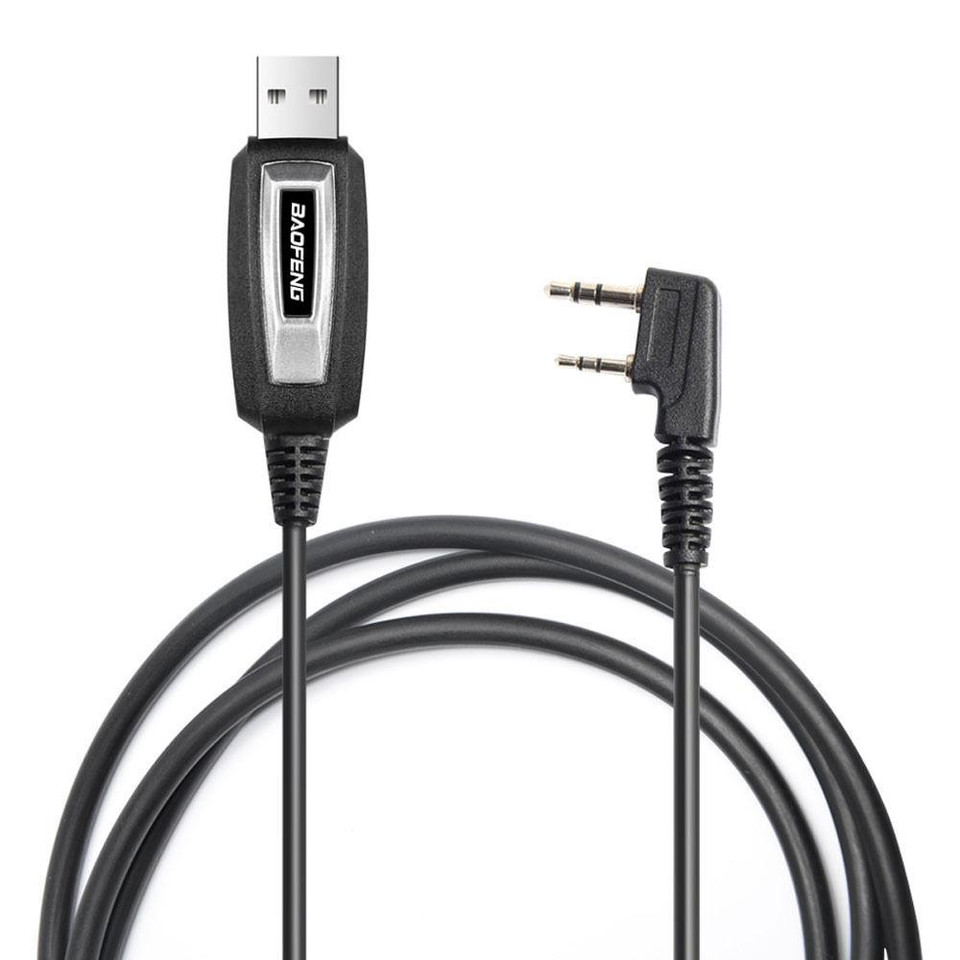
3. Use the Correct Programming Cable
A programming cable is often the difference between a smooth setup and a frustrating one. Baofeng's UK support content references CH340 driver guidance for certain programming cables. In practice, you should check:
- That the cable matches your exact radio family (K-plug 2-pin for most Baofeng models)
- Whether your cable uses a specific chipset that requires a driver
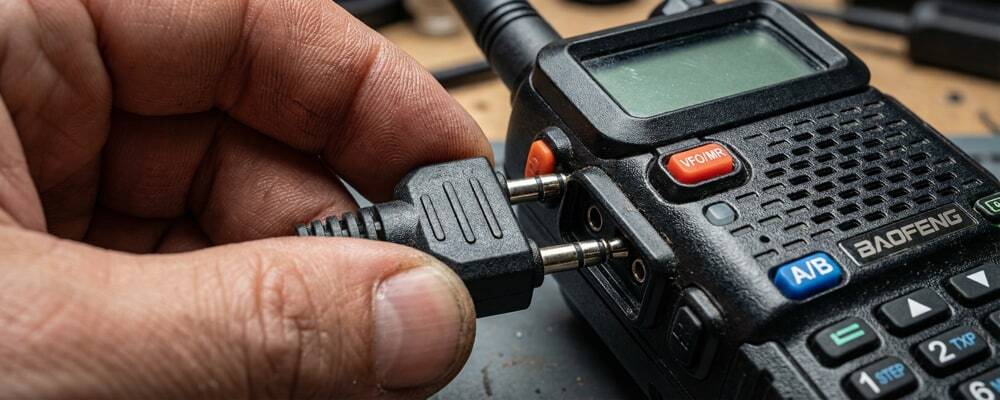
- That the 2-pin plug is fully and firmly seated into the radio's SP/MIC port
4. Understand What You Are Programming
Programming software makes changes easier, but it does not make every frequency or use automatically lawful. In the UK, Ofcom states that business radio systems generally require a licence, while licence-exempt use only applies where the equipment and operation meet the relevant conditions. That means you should be careful not to:
- Enter frequencies you are not licensed or entitled to transmit on
- Assume every handheld radio can be treated as licence-free
- Copy settings from the internet without fully understanding what they are and whether they are lawful for your use
Step-by-Step: How to Program Your Baofeng with CHIRP
Install CHIRP on Your Computer
Download CHIRP from the official CHIRP download page and install it for your operating system. CHIRP supports Windows, macOS and Linux. On macOS, CHIRP's tips page confirms you can verify the cable is being recognised in System Information or by checking connected serial devices in Terminal.
Install the Cable Driver if Needed
Some cables work immediately as plug-and-play, while others need a driver installed first. Baofeng's UK support content specifically references CH340 driver guidance for certain cables. If your computer does not detect the cable at all, the issue is almost always one of: missing driver, incompatible cable, poor USB connection, or the radio plug not firmly inserted.
Connect the Cable to the Radio and Computer
Turn the radio off first, then connect the 2-pin cable to the radio's SP/MIC port, and finally connect the USB end to your computer. Push the 2-pin connector in firmly — it should feel fully seated. This is the stage where many people incorrectly assume the radio or software is faulty, when it is actually just a half-inserted plug.
Open CHIRP and Select the Correct Port
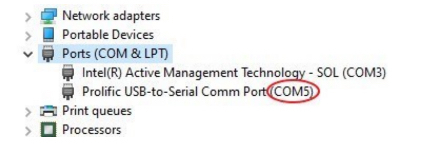
Open CHIRP and locate the serial or COM port linked to your programming cable. On Windows this appears as a COM port (e.g., COM3, COM4, COM5). On macOS or Linux it appears as a device path (e.g., /dev/cu.usbserial). Select the port that appeared after you plugged the cable in — that is your cable's port.
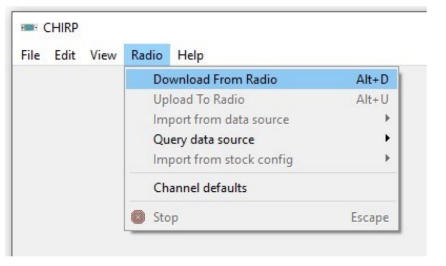
Download from the Radio First
In CHIRP, click Radio > Download From Radio before editing anything. This is one of the most important habits — it pulls the existing configuration into CHIRP and gives you a complete backup of the current factory setup. You will need to select the Vendor (Baofeng), Model, and Port. Many UV-5R variants share a common base family, so choosing the closest supported model is important.
Save a Backup File
Once CHIRP has successfully read the radio, immediately save that file using File > Save As before making any changes. This gives you a reliable restore point if anything goes wrong — and also means you can easily duplicate the same configuration to another radio of the same model later.
Edit Channels and Settings
Now you can edit the memory list in a far clearer way than through the keypad. Depending on the radio and CHIRP support level, you may be able to: add or delete channels, rename channels with clear labels, set CTCSS/DCS tones and repeater offsets, change power settings, and adjust radio menu options. Keep this stage tidy and name channels descriptively.

Double-Check Frequencies and Labels
Before uploading back to the radio, review everything carefully. This is especially important for UK users working with licensed, amateur, or business-use settings. Verify that frequencies, transmit/receive settings, CTCSS tones, and channel names are all correct and that you are authorised to use those frequencies.
Upload to the Radio
When you are satisfied with your changes, click Radio > Upload To Radio. Let the process complete fully — do not unplug the cable mid-transfer. Once finished, disconnect the cable safely and power the radio back on to verify the channels are showing correctly.
Test Before Depending on It
This is the step users most commonly skip — and it is arguably the most important one. If the radio is being used for work, events, hobby use or team communication, always test the following before relying on it in the field:
- Audio quality on transmit and receive
- Channel order and channel names
- Receive and transmit behaviour on each channel
- CTCSS/DCS tone settings — do other radios in the group hear you?
- Repeater offset and shift behaviour, if configured
Software programming saves significant time, but real-world testing is the only way to catch practical mistakes before they matter.
Common CHIRP Problems and How to Fix Them
❌ CHIRP Cannot Find the Radio
Usually caused by one of four things: wrong or missing cable driver, wrong COM/serial port selected, 2-pin plug not fully inserted, or wrong radio model chosen in CHIRP. Work through each check systematically before assuming the cable or radio is faulty.
❌ "Radio Refused to Enter Programming Mode"
This is a known issue on CHIRP's tracker for certain Baofeng-family radios. It can be caused by cable problems, radio variant differences, or using an incorrect model profile. Try selecting a closely related model (e.g., UV-5R instead of UV-5R v3) and attempt again.
❌ Cable Appears Connected but Nothing Happens
Run through the basics: try a different USB port on your computer, reseat the 2-pin plug firmly into the radio, restart CHIRP, confirm the driver is showing in Device Manager (Windows) or System Information (macOS), and ensure the radio battery has sufficient charge.
❌ Wrong COM Port / Port Not Listed
The correct port only appears after the cable is plugged in. Unplug the cable, note which ports are listed in CHIRP, then plug the cable back in and refresh — the new port that appears is your cable's port. On Windows, Device Manager shows the correct COM number after driver installation.
Practical Tips for a Smoother Setup
📁 Keep One Master File
If you manage several radios of the same model, maintain one clearly named master CHIRP file. Duplicate from that master when cloning to additional radios. This saves time, reduces inconsistency, and means you always have a clean reference to return to.
🔧 Change Only a Few Things at a Time
For first-time users, avoid editing dozens of settings in one pass. Make a small number of changes, upload to the radio, and test. This makes it much easier to identify which change caused a problem if something does not behave as expected.
🏷️ Label Channels Properly
A clean, clearly labelled channel list is far easier to use in the field than a messy one. Good alphanumeric labels (e.g., "LOC RPT 1", "CALL CH", "TEAM 3") reduce mistakes during real-world operation and make the radio immediately usable by anyone on your team.
💾 Always Keep Your Backup Safe
Store your CHIRP backup files in a cloud folder or external drive. If your radio is reset, lost, or replaced, having a backup means you can restore your full channel list in minutes rather than reprogramming from scratch.
Where Baofeng Fits In
For many buyers, Baofeng's appeal is straightforward: affordable radios, wide model availability, and a large global user base that consistently prefers software programming over manual menu entry. That makes CHIRP especially practical for budget-conscious users, beginners, hobby operators, and teams that want a reliable way to configure multiple handsets without spending more than necessary.
Whether you are setting up radios for a hiking group, a community event, a small business, or your first steps into amateur radio with a Foundation licence, the combination of a Baofeng radio and CHIRP software remains one of the most accessible and cost-effective setups available.
Helpful Related Guides
Need a Programming Cable or New Radio?
Shop genuine Baofeng programming cables, radios and accessories:
Frequently Asked Questions
Is CHIRP free for Baofeng radios?
Yes. CHIRP describes itself as a free cross-platform programming tool for supported radios, including the majority of Baofeng models. It is available to download at no cost from chirpmyradio.com.
Can I use CHIRP on a Baofeng UV-5R?
Usually yes. CHIRP has a dedicated wiki page for the Baofeng UV-5R Series, UV-82 and related variants, making it the most widely used programming software for these models. Always verify that your specific variant is listed as supported before beginning.
Why is CHIRP not detecting my Baofeng radio?
The most common causes are: missing or incorrect cable driver (typically CH340 on Windows and macOS), wrong COM port selected in CHIRP, a loose 2-pin connection at the radio's SP/MIC port, or choosing the wrong radio model in CHIRP's download dialog. Work through each check systematically.
Do I need a special cable to program a Baofeng with CHIRP?
Yes — you need a compatible 2-pin Kenwood-style USB programming cable for your radio model family. Some cables require a driver (such as the CH340 driver) to be installed on your computer first. Always use a genuine Baofeng cable to avoid compatibility and reliability issues.
Is it legal to program any frequency into a Baofeng in the UK?
No. Programming a frequency into a radio does not automatically make it lawful to transmit on. Ofcom states that business radio use generally requires a licence, and licence-exempt use only applies where the equipment and operation meet specific conditions. Always ensure you hold the appropriate licence for the frequencies you intend to use. See our UK Ham Radio Licence Guide for full details.
Should I download from the radio before editing in CHIRP?
Yes — always. Downloading from the radio first creates a backup of the current factory configuration before you make any changes. This is your safety net if something goes wrong, and it also means you can quickly clone the same setup to another radio of the same model.
Can I use CHIRP to clone one Baofeng to another?
Yes. Download from Radio A and save the CHIRP file. Then connect Radio B, select Upload To Radio, and CHIRP will write the same configuration. This is one of the most practical uses of CHIRP for teams or events where multiple radios need identical channel setups.
Does CHIRP work on macOS and Linux as well as Windows?
Yes. CHIRP is a cross-platform application that runs on Windows, macOS (both Intel and Apple Silicon), and Linux. On macOS, you may need an FTDI-chipset cable or to install the appropriate USB serial driver for your cable's chipset. The CHIRP tips page provides macOS-specific guidance for verifying cable detection.
Final Thoughts
Programming your Baofeng with CHIRP is a manageable process once you have the right cable, the right model selection, and a clean backup of the radio's existing settings in place. The best approach is simple and repeatable: read from the radio first, save a backup, make careful and deliberate edits, upload, and then test in real use before relying on the radio in the field.
For most users — whether beginners, hobbyists, or small teams — that straightforward workflow is the quickest and least frustrating way to keep a Baofeng radio set up exactly the way you need it.
Need more help? Read our complete CHIRP and CPS Software Programming Guide with Screenshots, or explore Baofeng UK software and driver downloads.