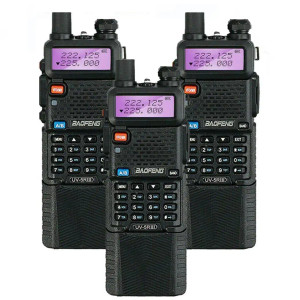
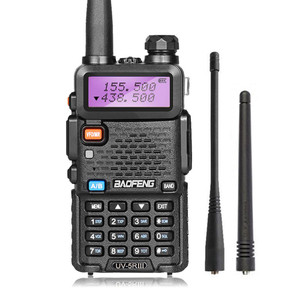
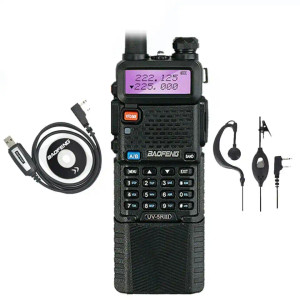
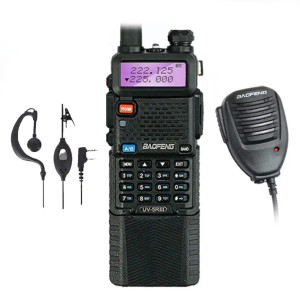
VERSATILE RADIO FOR AMATEUR USE
The BaoFeng UV-5R III Ham Radio is legal for use on amateur frequencies. The UV-5R III Ham Radio is able to Transmit on Narrowband (12.5kHz) and Wideband (25kHz).
Dual Watch Receiver
The BaoFeng UV-5R III Ham Radio has one built-in receiver but can “watch” two channels (semi duplex). Monitor two different frequencies (even on different bands (VHF/UHF)) and the radio will monitor both frequencies giving priority to the first station to receive an incoming call.
FM Broadcast Station (Optional)
You can listen to the FM Broadcast radio, while still monitoring your radio frequencies in the background. Any incoming call will be given priority insuring you never miss an important call while listening to the radio. This is useful during disasters, when emergency broadcasts and information are put out through local radio stations.
Group Tones supported
The BaoFeng UV-5R III Ham Radio supports the most common Analog Tones. It supports CTCSS, DCS, and DTMF calling methods. Set-up your calling methods to call by group tones. Tone calling (private line) is required by most repeater applications and the UV-5R III Ham Radio supports the latest standards
The BaoFeng UV-5R III Ham Radio can even send DTMF tones. This allows for sending ANI (Caller ID) or remote commands that require DTMF tones
Customize Your Operation with channels, Programmable Buttons, and more!
You can program your BaoFeng UV-5R III Ham Radio exactly how you want it. There are 128 programmable memory channels. You can add or remove channels from scanning list using the free computer software. You can give channels alphanumeric names, using a computer. The radio has 2 power levels (5 watt maximum), allowing you to choose how far you can communicate. You can set VFO limits using the CHIRP software. You can easily program from a PC to set-up the radio to operate exactly as needed.
Package Include:
-1 x Baofeng UV-5R III Tri-band Black Walkie Talkie Transceiver
-1 x 7.4V 3800mah Original Baofeng Li-ion Battery Pack
-2 x Antenna
-1 x Hand Strap
-1 x Belt Clip
-1 x ENG Manual
-1 x Desktop Charger with USB Connector Male
-1 x PTT Earpiece for free
Q&A
How to manually program a simplex channel
- Step 1. Press [VFO/MR] and enter Frequency Mode.
- Step 2. Press [A/B] and choose the A Side (upper display).
The A side must be used to program channels into the radio. Programming data entered on the B Side (lower display) will not be saved.
- Step 3. Press [BAND] for the frequency band.
Toggle [BAND] to choose 136 MHz (VHF) or 470 MHz (UHF).
If the incorrect band is chosen for the frequency entered in Step 5, the radio will cancel the operation.
- Step 4. Disable TDR (Dual Watch/Dual Standby).
Press [MENU] 7 [MENU] [press up/down arrow keys] OFF [MENU] [EXIT]
It is highly advised to turn TDR off when programming directly from the radio.
- Step 5. Enter the frequency.
Use the keypad to enter the frequency into the radio.
- Step 6. optional - Enter the transmit CTCSS/DCS code.
- CTCSS - [MENU] 13 [MENU] [enter/choose code XXXX] [MENU] [EXIT]
- DCS - [MENU] 12 [MENU] [choose code XXXXX] [MENU] [EXIT]
- Step 7. Assign the frequency to a channel.
[MENU] 27 [MENU] [enter channel number XXX] [MENU] [EXIT]
How to manually program a repeater channel
- Step 1. Press [VFO/MR] and enter Frequency Mode.
- Step 2. Press [A/B] and choose the A Side (upper display).
Like the simplex channels, the A side must be used to program the repeater channels into the radio. Programming data entered on the B Side (lower display) will not be saved.
- Step 3. Press [BAND] for the frequency band
Toggle [BAND] to choose 136 MHz (VHF) or 470 MHz (UHF).
If the incorrect band is chosen for the frequency entered in Step 6, the radio will cancel the operation.
- Step 4. optional - Clear any CTCSS/DCS codes previously assigned to the channel.
If no previous codes exist or when setting up the channel for the first time and no codes are needed, set the menu items listed below to OFF.
- RX DCS - [MENU] 10 [MENU] [enter 0 (OFF)] [MENU] [EXIT]
- RX CTCSS - [MENU] 11 [MENU] [enter 0 (OFF)] [MENU] [EXIT]
- TX DCS - [MENU] 12 [MENU] [enter 0 (OFF)] [MENU] [EXIT]
- TX CTCSS - [MENU] 13 [MENU] [enter 0 (OFF)] [MENU] [EXIT]
- Step 5. Disable TDR (DualWatch/Dual Standby).
Press [MENU] 7 [MENU] [press up/down arrow keys] OFF [MENU] [EXIT]
It is highly advised to turn TDR off when programming directly from the radio.
- Step 6. optional - Delete any existing data on the channel to program.
Skip this step when setting up the channel for the first time.
Press [MENU] 28 [press up/down arrow keys to choose channel number] [MENU] [EXIT]
It is highly advised to turn TDR off when programming directly from the radio.
- Step 7. Enter the repeater output (your receiving) frequency.
Use the keypad to enter the frequency into the radio.
- Step 8. Input the repeater frequency offset.
Press [MENU] 26 [MENU] [enter the offset for 2 meter or 70 cm repeater] [MENU] [EXIT]
- Step 9. Enter the Transmit Frequency Shift.
Press [MENU] 25 [MENU] [enter 1 for positive shift or 2 for negative shift] [MENU][EXIT]
- Step 10. optional - Enter the transmit CTCSS/DCS code.
- CTCSS - [MENU] 13 [MENU] [enter/choose code XXXX] [MENU] [EXIT]
- DCS - [MENU] 12 [MENU] [choose code XXXXX] [MENU] [EXIT]
- Step 11. Assign the receive frequency entered in Step 7 to the channel.
[MENU] 27 [MENU] [enter channel number XXX] [MENU] [EXIT]
- Step 12. Press the [*Scan] button to activate Reverse Mode and display the transmit frequency.
- Step 13. Assign the transmit frequency to the channel.
Press [MENU] 27 [MENU] [enter the same memory channel entered in step 12] [MENU] [EXIT]
- Step 14. Press the [*Scan] button to exit Reverse Mode.


